

The cardboard sword. A staple of every boy's childhood. Easy, cheap, not very durable. Here's my shot at making the cardboard sword a bit more tolerant of the bumps and bruises of childhood fencing.

We've tried heavy corrugated cardboard, thick wrapping paper rolls, doubling up and taping down - but nothing has ever solved the inevitable bending and breaking of our many cardboard swords. So I began thinking about making a sword out of an etsy-staple... felt.
Of course it would still need some kind of reinforcement and thus the felt sword with a replaceable cardboard insert was born. Here's the tutorial:
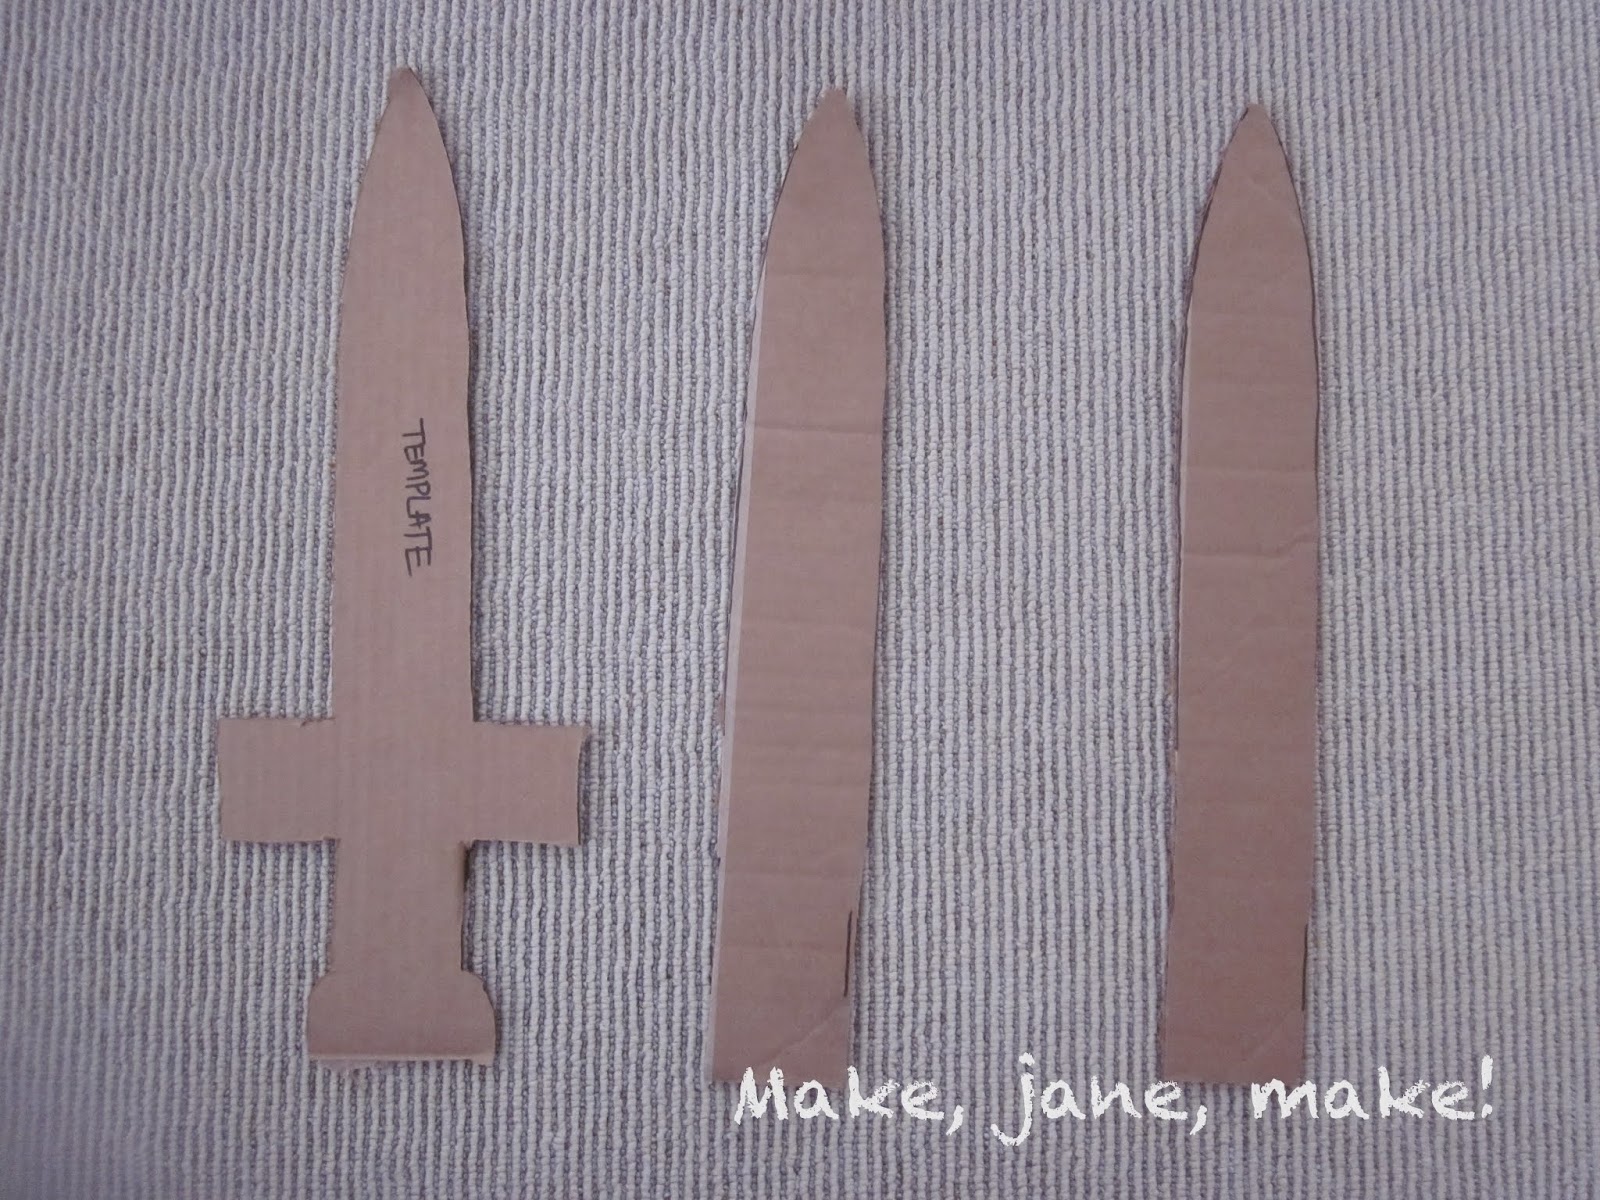
(1) Design your sword. Make sure that your sword is the same thickness at the top and bottom or that it tapers from the base to the tip. (If you have a sword this is wider at the tip, you'll never be able to slide the cardboard insert in through the bottom. Or if you design a beautiful curved sabre, you'll need some fancy angle measuring to ensure that you can slide a piece of cardboard in and out of it.) Here are my template and also some inserts. For the insert, you just trace the sword template without the pommel and guard and cut them slightly thinner so that they will fit inside the felt... and yes, I had to google what those parts of the sword were called just now. If you have a large enough piece of cardboard, try to cut the inserts so that the corrugated ribs run up and down the length of the sword, this will increase the strength of the blade and decrease the chance that you'll get a quick crease.
p.s. When cutting out the insert, trace your template and cut about a 1/4-inch inside the template line.

(2) Using your template, cut two swords out of grey/silver felt. (I'm making two swords here, which is why my math doesn't seem to add up)

(3) Now using only the cross-guard, hilt and pommel section of your template, cut one out on the fold of some black felt so that you get a piece that looks like this:


Just to give you an idea of how it all comes together, here's a pic of the pieces laying on top of each other in their final configuration. The black semi-circular pommel will eventually fold over the bottom and conceal the opening for the cardboard insert.

(5) Sew each black hilt piece onto its corresponding grey sword by sewing around the edges with a zig-zag or some kind of decorative stitch - I used a contrasting thread colour and a kind of medieval stitch. Embellish the blade with a long straight stitch down the centre of each blade with black thread. Do not sew the two halves together until all this stitching is done.

(6) Almost there! Attach small squares of hook and loop tape to each half to close the pommel flap.

On the right-side of the short half (front of the flapless half), sew on a small piece of hook tape.
 |
| Hook tape on right-side of the shorter half |
 |
| Loop tape on the wrong -ide of the longer half. |
(7) Final step!!! Using white or grey thread, sew the two halves together: with the right-sides facing out, sew around the outside of the sword, leaving the bottom of the sword open.


En garde!

When the cardboard get worn out; open up the flap, remove the old insert and pop in a new one before the kids can even blink and say, "Mommy, it's broken."
No comments:
Post a Comment